Create Markers
Motivation
Before tracking markers with your camera, you need to create, print and place them in the environment. You can use four type of Aruco objects: markers, grid boards, charuco boards and diamond markers.
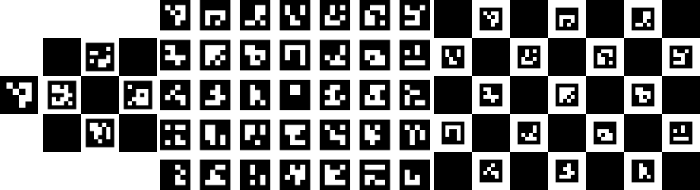
From left to right: a marker, a diamond marker, a grid board, a charuco board.
CreateMarkers scene
Open the Assets/ArucoUnity/Scenes/CreateMarkers.unity scene to visualize the Aruco objects. Play this scene to create them. You can find the created images in Assets/ArucoUnity/Images/.
Manual creation
Marker
Manual creation and configuration of a marker.
- Create an empty object.
- Add a
ArucoMarkerscript. Configure it:- Select a dictionary of markers. It determines the marker size (for example 4x4 bits) and had a size (for example 50 markers). A lower dictionary size is better to avoid detection errors. For more details, see "Markers and Dictionaries" and "Selection a dictionary" sections of this tutorial.
- Set
MarkerSideLengthin pixels. It controls the image size. - Set
MarkerBorderBitswith a minimum of 1. It controls the width of the black border of the marker, helping its detection. - Set
MarkerId, from 0 to the dictionary size.
- Add a
ArucoObjectCreatorscript. Configure it:- Add the
ArucoMarkerscript to theArucoObjectfield. - Check
DisplayInPlayModeif you want to display the marker in play mode. - Check
SaveImageto save the marker in an image file in play mode. - Set the
OutputFolderpath to save the image, relative to the persistentDataPath in builds or to the "Assets" folder of your project in the editor. - Check
AutomaticFilenamefor an automatic image filename based on theArucoObjectproperty values. - Set the image filename in
OptionalImageFilenameifAutomaticFilenameis not checked.
- Add the
- Play the scene. The marker is automatically created on a child plane of our object and saved on the project folder.
Grid board
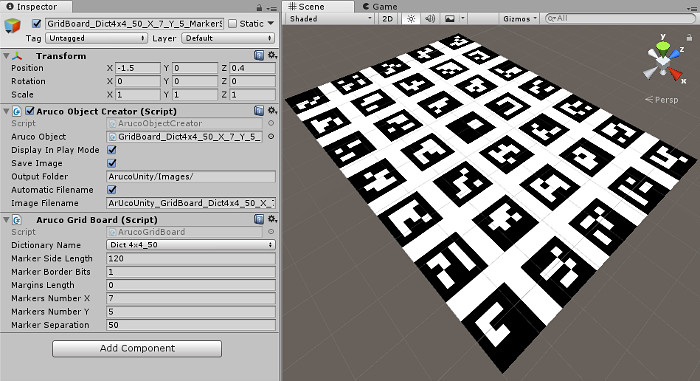
Example of a grid board with the corresponding configuration.
The process is the same as in the marker subsection.
The additional configurable parameters are:
MarkersNumberX: The number of markers on the board X axis.MarkersNumberY: The number of markers on the board Y axis.MarkerSeparation: The margin between markers in pixels.
Charuco board
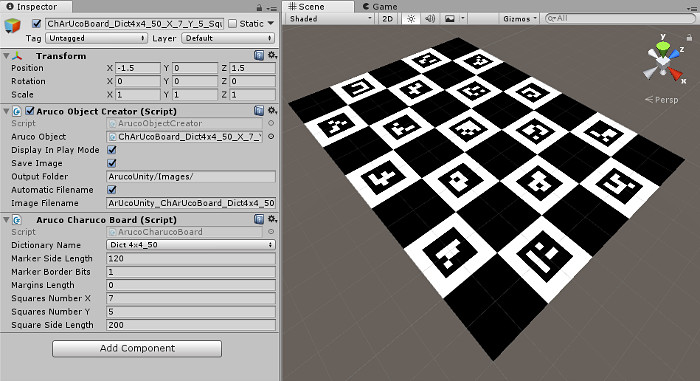
Example of a charuco board with the corresponding configuration.
The process is the same as in the marker subsection.
The additional configurable parameters are:
MarginLength: The markers margin on the white squares.SquaresNumberX: The number of squares on the board X axis.SquaresNumberY: The number of squares on the board Y axis.SquareSideLength: The width in pixels of each square.
Diamond marker
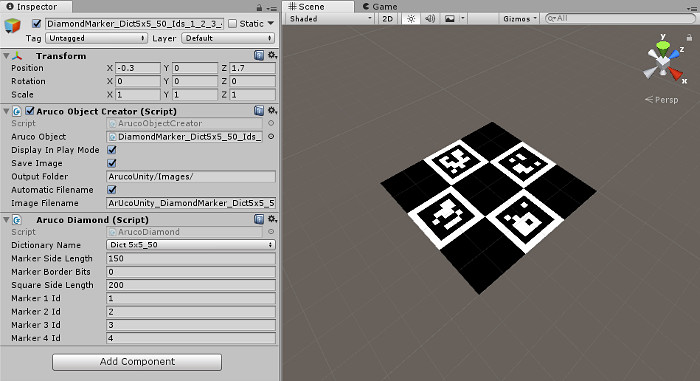
Example of a diamond marker with the corresponding configuration.
The process is the same as in the marker subsection.
The additional configurable parameters are:
SquareSideLength: The width in pixels of each square.MarkersXId: The ids of the four markers.